图标字体
我们现在为我们的主题引入iconfont(图标字体),先把图标字体准备好:


查阅AMP文档之后,我们可以了解到AMP可以直接引入字体css:
<link rel="stylesheet" href="https://fonts.googleapis.com/css?family=Tangerine">
但是这种方式要求引入的CSS所属域只能是以下列表里的网站:
- Typography.com: https://cloud.typography.com
- Fonts.com: https://fast.fonts.net
- Google Fonts: https://fonts.googleapis.com
- Typekit: https://use.typekit.net
-
Font Awesome: https://maxcdn.bootstrapcdn.com, https://use.fontawesome.com
不在这个白名单里的外链CSS是无法在AMP页面引入的,还好我们可以选择直接在页面CSS中引入字体文件,就像是这样:
@font-face {
font-family: 'iconfont';
src: url('<?php echo get_template_directory_uri() ?>/fonts/iconfont.eot?#iefix') format('embedded-opentype'),
url('<?php echo get_template_directory_uri() ?>/fonts/iconfont.woff2') format('woff2'),
url('<?php echo get_template_directory_uri() ?>/fonts/iconfont.woff') format('woff'),
url('<?php echo get_template_directory_uri() ?>/fonts/iconfont.ttf') format('truetype'),
url('<?php echo get_template_directory_uri() ?>/fonts/iconfont.svg#iconfont') format('svg');
}
然后我们直接再页面里定义并使用iconfont中图标对应的unicode:
.iconfont {
font-family: "iconfont";
-webkit-font-smoothing: antialiased;
-moz-osx-font-smoothing: grayscale;
}
完善文章列表
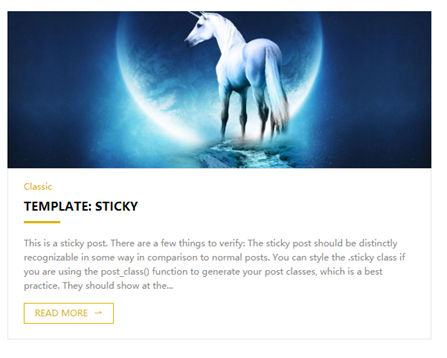
现在我们来继续完善文章列表,首先加入阅读更多按钮:
<div class="flex-box">
<a href="<?php the_permalink(); ?>" class="read-more"><?php _e('READ MORE'); ?><span class="iconfont icon-ml-readmore"></span></a>
</div>
这里我们就用上了iconfont,效果如下:
现在我们加上评论、阅读、点赞信息,这里需要注意,wordpress默认其实是没有浏览量和点赞的,这里我们在functions.php里加入这些功能,然后后面我们就可以到页面模板里插入这个方法:
// add views
function is_spider() {
$agent= strtolower($_SERVER['HTTP_USER_AGENT']);
if (!empty($agent)) {
$spiders= array(
'Googlebot', 'Baiduspider', 'ia_archiver',
'R6_FeedFetcher', 'NetcraftSurveyAgent',
'Sogou web spider', 'bingbot', 'Yahoo! Slurp',
'facebookexternalhit', 'PrintfulBot', 'msnbot',
'Twitterbot', 'UnwindFetchor', 'urlresolver'
);
foreach($spiders as $val) {
if (strpos($agent, strtolower($val)) !== false) {
return true;
}
}
} else {
return false;
}
}
function set_post_views()
{
if (is_singular() && !is_spider())
{
$post_id = get_the_ID();
if($post_id)
{
$post_views = (int)get_post_meta($post_id, 'views', true);
if(!update_post_meta($post_id, 'views', ($post_views+1)))
{
add_post_meta($post_id, 'views', 1, true);
}
}
}
}
// add likes
function set_post_likes()
{
// 暂时空置 以后实现
}
我们加了一个is_spider方法,让浏览量的统计将搜索引擎蜘蛛排除在外,关于点赞的功能我们也留待以后实现,我们先预定好这两个参数,然后到页面里显示:
<div class="flex-box justify-between">
<a href="<?php the_permalink(); ?>" class="read-more"><?php _e('READ MORE'); ?><span class="iconfont icon-ml-readmore"></span></a>
<div class="flex-box post-meta-box">
<a class="post-meta" href="<?php the_permalink() ?>#comments"><span class="iconfont icon-mr-postmeta"></span><?php comments_number('0', '1', '%'); ?></a>
<a class="post-meta" href="<?php the_permalink() ?>"><span class="iconfont icon-mr-postmeta"></span><?php echo (int)get_post_meta(get_the_ID(), 'views', true); ?></a>
<a class="post-meta" href="<?php the_permalink() ?>"><span class="iconfont icon-mr-postmeta"></span><?php echo (int)get_post_meta(get_the_ID(),'likes',true); ?></a>
</div>
</div>
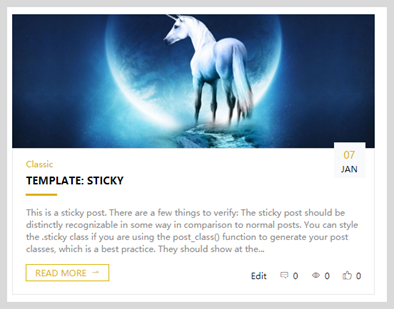
我们再加上文章的发布日期:
<div class="flex-box post-publish-date">
<div class="post-date">
<?php echo get_the_date('d') ?>
</div>
<div class="post-month">
<?php echo get_the_date('M') ?>
</div>
</div>
这样我们的首页文章列表就基本完成了:
现在我们做今天的最后一项工作,程序员最爱之分页:
<?php echo get_the_posts_pagination( array(
'mid_size' => 3,
'prev_next' => false,
) ); ?>
声明?就这么几行就OK了?没错!我们加上一些CSS描述后,就成这样了:
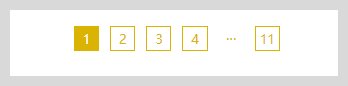
WordPress对分页的输出还是比较好的,基本不用费事就完成了。
总结和预告
今天我们为主题引入了iconfont自定义图标,完成了文章列表页的全部内容,最后的分页也十分之轻松。
明天我们将挑战制作右侧边栏,这也是wordpress传统blog主题中至关重要的一部分。
如果你喜欢这个系列的文章,赶快关注我们(数字江湖异志录)吧,不要错过后续的更多干货噢。


