确立目标
欢迎来到《真香,30天做一套wordpress主题》系列文章,我们的目标是(没有蛀牙!)建立一套全新的wordpress主题,花上30天的时间闭关修炼,如果你看到的第一篇文章不是《基础框架搭建》,建议你关注我们(数字江湖异志录),从该系列的第一篇开始阅读。
我们将尽量保持文章的循序渐进和通俗易懂,请确保自己已经掌握了那一篇文章的全部内容时才选择跳过,不然可能会错过关键的信息噢~
理论基础
这里我们假定你已经知晓了以下基础知识,这些基础知识对理解文章内容是至关重要的:
- HTML/CSS/JS基础
- PHP基础
- 如何使用Wordpress
- 如何搭建web环境
如果你已经知晓了以上基础知识,恭喜你,本系列的任何文章内容对你而言都没有什么难度。
产品设定
当我准备制作一款wordpress主题的时候,我在脑海里浮现出几个关键字,然后迫不及待地把它们写了下来,而这些将上贯穿我们整个制作过程的核心产品/技术设定:
- 纯AMP主题(极致速度体验)
- 移动端/PC端响应式布局(Flex布局)
- Pure CSS design(无图设计)
- 极简&科技风格(简约但不简单)
- 传统blog style(还是那个配方 还是那个味道)
- SEO优化(自带SEO光环)
- 无插件依赖(Plugin free)
WordPress主题基础结构
我们先来看一张图了解一下wordpress主题的基础页面结构:
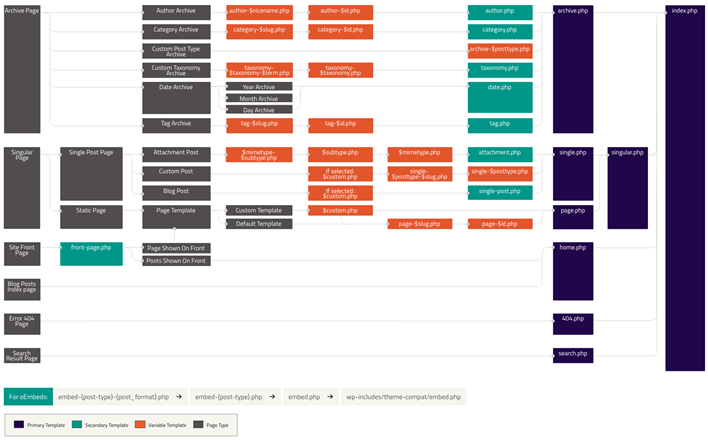

(图片来源:wphierarchy.com)
这张图很清晰的表达了整个wordpress主题的层级结构,看上去有点复杂,但我们其实不需要制作所有的页面,只需要关注最后的两层就可以了,我们可以看到,其实整个wordpress主题的关键文件只需要一个index.php就够了,但我们实际不会这样做,因为把所有的页面内容都写到一个文件里实在是太耦合了,所以我们关注到上一个层级,并确定了以下几个需要制作的主题页面:
- home.php 首页
- 404.php 404未找到页面
- search.php 搜索页面
- singular.php 文章页面
- archive.php 存档页面
总共5个页面,这样看是不是还挺简单的呢?
开始搭建
我们给这款主题取名叫FreeGeek,找到wordpress文件夹下,按如下路径建立FreeGeek文件夹。
/wp-content/themes/FreeGeek
我们需要建立的第一个文件是style.css,这个文件主要是对主题进行描述(通过注释)。
/*
Theme Name: FreeGeek
Text Domain: FreeGeek
Version: 1.0
Requires at least: 4.7
Requires PHP: 5.2.4
Description: Some description
Tags: blog, two-column, amp, purecss
Author: the Inline-flex team
Author URI:
Theme URI:
License: GNU license
*/
啥?为什么就是一些注释?没错,就这些就够了,至于为什么要选择从一个style.css文件里读取配置信息,这个就得去问wordpress官方团队了(我估计这应该是有历史渊源的)。
然后我们建立一个index.php文件,内容为空,作为最顶层的一级,index.php文件是必不可少的。
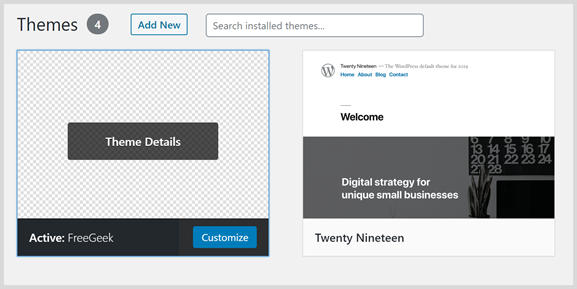
这样我们就可以在后台主题列表里看到我们的FreeGeek主题了,虽然还什么都没有。

点击主题详情,我们就能看到那些在style.css里描述的主题信息:
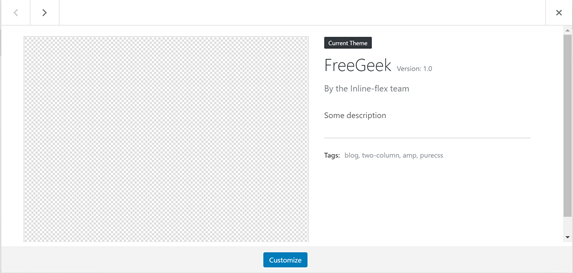

这里其实还需要一张主题的截图文件,我们到后期再添加。
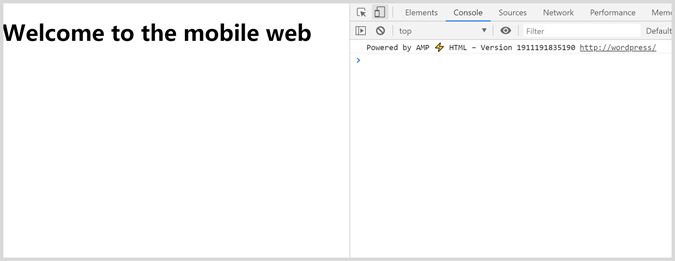
终于可以写代码了,我们建立一个home.php文件,从amp官网文档里复制一段快速开始的代码并稍作清理:
<!doctype html>
<html amp lang="en">
<head>
<meta charset="utf-8">
<script async src="https://cdn.ampproject.org/v0.js"></script>
<title>Hello, AMPs</title>
<link rel="canonical"
href="https://amp.dev/documentation/guides-and-tutorials/start/create/basic_markup/">
<meta name="viewport" content="width=device-width,minimum-scale=1,initial-scale=1">
<style amp-boilerplate>body{-webkit-animation:-amp-start 8s steps(1,end) 0s 1 normal both;-moz-animation:-amp-start 8s steps(1,end) 0s 1 normal both;-ms-animation:-amp-start 8s steps(1,end) 0s 1 normal both;animation:-amp-start 8s steps(1,end) 0s 1 normal both}@-webkit-keyframes -amp-start{from{visibility:hidden}to{visibility:visible}}@-moz-keyframes -amp-start{from{visibility:hidden}to{visibility:visible}}@-ms-keyframes -amp-start{from{visibility:hidden}to{visibility:visible}}@-o-keyframes -amp-start{from{visibility:hidden}to{visibility:visible}}@keyframes -amp-start{from{visibility:hidden}to{visibility:visible}}</style>
<noscript><style amp-boilerplate>body{-webkit-animation:none;-moz-animation:none;-ms-animation:none;animation:none}</style></noscript>
</head>
<body>
<h1>Welcome to the mobile web</h1>
</body>
</html>
这样我们的首页就可以访问了:

现在我们来抽离公共html head,并使用wordpress的方法对一些基础内容进行填充:
home.php
<!doctype html>
<html amp <?php language_attributes(); ?>>
<head>
<?php get_header() ?>
<style amp-custom>
/* 自定义style内容 */
</style>
</head>
<body>
</body>
</html>
现在页面跑不起来了,会报错,因为我们还没有建立header.php文件,wordpress自动加载这个文件会找不到。
我们来建立header.php文件:
<meta charset="utf-8">
<script async src="https://cdn.ampproject.org/v0.js"></script>
<title><?php echo wp_get_document_title() ?></title>
<link rel="canonical" href="<?php echo home_url($_SERVER['REQUEST_URI']) ?>">
<meta name="viewport" content="width=device-width,minimum-scale=1,initial-scale=1">
<style amp-boilerplate>body{-webkit-animation:-amp-start 8s steps(1,end) 0s 1 normal both;-moz-animation:-amp-start 8s steps(1,end) 0s 1 normal both;-ms-animation:-amp-start 8s steps(1,end) 0s 1 normal both;animation:-amp-start 8s steps(1,end) 0s 1 normal both}@-webkit-keyframes -amp-start{from{visibility:hidden}to{visibility:visible}}@-moz-keyframes -amp-start{from{visibility:hidden}to{visibility:visible}}@-ms-keyframes -amp-start{from{visibility:hidden}to{visibility:visible}}@-o-keyframes -amp-start{from{visibility:hidden}to{visibility:visible}}@keyframes -amp-start{from{visibility:hidden}to{visibility:visible}}</style>
<noscript><style amp-boilerplate>body{-webkit-animation:none;-moz-animation:none;-ms-animation:none;animation:none}</style></noscript>
这里需要关注的几个wordpress内置方法是:
- wp_get_document_title 获取文档标题
- language_attributes 当前语言设定,比如en-US
这样我们就完成了head的抽离,最终页面访问仍然和之前的页面保持一致。
总结和预告
今天我们实现了一个wordpress AMP主题的基础框架,即便现在还处于完全不能用的状态,但我们已经迈出了重要的一步,明天我们将关注到主题自定义参数的使用,并初步搭建页面公共顶部区域。
如果你喜欢这个系列的文章,赶快关注我们吧,不要错过后续的更多干货。