直奔主题
新版的wordpress增加了自定义主题设置的功能,并且官方也推荐开发者把相关的设置放到主题自定义里。默认的情况下,主题会自动开启一些自定义参数(即使我们的主题还没有使用它们):
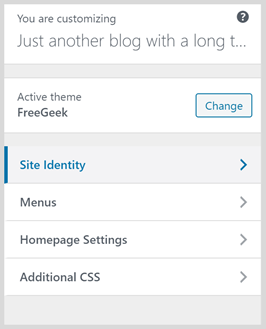

我们在主题文件夹下建立一个functions.php文件,这个文件会影响到主题的方方面面,首先我们建立自定义的主题参数连接:
// Customizer
function my_customize_register($wp_customize) {
};
add_action( 'customize_register', 'my_customize_register' );
相关的主题设定我们都会写到my_customize_register里,我们先来了解三个基本概念:
- Section
- Settings
- Control
为了方便理解,我们可以把section当成设置的一级菜单,control是菜单里的设置控件,settings则是存储设置的容器。
通过查阅wordpress文档,我们找出了那些默认开启的section的唯一id,然后我们在代码里把它们去除:
// Customizer
function my_customize_register($wp_customize) {
// remove default section
$wp_customize->remove_section('title_tagline');
$wp_customize->remove_section('custom_css');
$wp_customize->remove_section('static_front_page');
};
然后我们添加自己的section、control、settings,这里我们先盘点一下目前的需求,我们需要对页面的公共顶部进行设置,公共顶部含有以下元素:
- 博客标题
- 主标语(slogan/tagline)
- 副标语
那么我们在functions.php里实现代码是像这样的:
$wp_customize->add_section( 'header_setting' , array(
'title' => __( 'Header Setting'),
'priority' => 10,
) );
$wp_customize->add_setting( 'blog_title' , array(
'default' => get_bloginfo('name'),
'transport' => 'refresh',
) );
$wp_customize->add_setting( 'main_tagline' , array(
'default' => 'Free the Internet',
'transport' => 'refresh',
) );
$wp_customize->add_setting( 'sub_tagline' , array(
'default' => 'Across the Great Wall we can reach every corner in the world',
'transport' => 'refresh',
) );
$wp_customize->add_control(
'input_blog_title',
array(
'label' => __( 'Blog Title'),
'section' => 'header_setting',
'settings' => 'blog_title',
'type' => 'text',
)
);
$wp_customize->add_control(
'input_main_tagline',
array(
'label' => __( 'Main tagline'),
'section' => 'header_setting',
'settings' => 'main_tagline',
'type' => 'text',
)
);
$wp_customize->add_control(
'input_sub_tagline',
array(
'label' => __( 'Sub tagline'),
'section' => 'header_setting',
'settings' => 'sub_tagline',
'type' => 'textarea',
)
);
这里我们用到了三个方法:
- add_section
- add_settings
- add_control
对应section、settings、control的添加,需要注意的是,我们在设置文本的title输出那里用到了魔术方法__(),这是为后期主题的国际化做准备,魔术方法__()和魔术方法_e()都是为了主题多语言而存在的,它们之间的不同就是__()返回字符串,而_e()直接把文本在页面里输出,当然,它们都是根据当前系统设定的语言找到对应的语言包输出的,主题国际化的相关内容我们在本系列的后期进行展开。
这样设定之后,我们就可以在主题的任意位置调用这些设置好的内容,现在我们把它们在home.php里显示出来看看。
<body>
<header>
<?php echo get_theme_mod('blog_title') ?>
<?php echo get_theme_mod('main_tagline', 'Free the Internet') ?>
<?php echo get_theme_mod('sub_tagline', 'Across the Great Wall we can reach every corner in the world') ?>
Header Area
</header>
</body>
这里我们用到的内置方法是get_theme_mod,我们传两个参数给它,一个是主题设置的settings id,一个是默认值。
还记得我们在第1天建立框架时有添加的style amp-custom吗,我们在里面添加一段css,让我们的header凸显出来:
<style amp-custom>
header {
width: 100vw;
height: 18.5185vw;
background: gray;
}
</style>
刷新页面,我们应该能看到这样的页面输出:
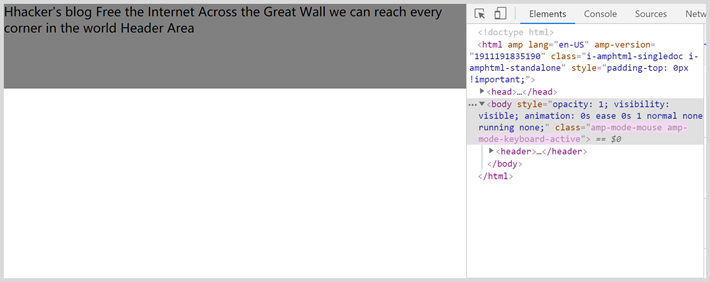

这里,Hhacker's blog是我的blog名称,其它的就是刚才我们设定的主标语和副标语的默认值了。
我们在主题自定义那里设定这些settings并点击发布时,页面里对应的部分就会发生变化了。
接下来我们顺便把主题的favicon参数也实现了吧,favicon是显示在浏览器标签页上的小图标,我们按照之前的方法,建立一套settings和control,并绑定到我们的section里:
$wp_customize->add_setting( 'favicon' , array(
'default' => '',
'transport' => 'refresh',
'sanitize_callback' => 'absint',
) );
$wp_customize->add_control( new WP_Customize_Site_Icon_Control( $wp_customize, 'set_favicon',
array(
'label' => __( 'Favicon' ),
'description' => __( 'Favicon is what you see in <strong>browser tabs</strong>, bookmark bars'),
'section' => 'header_setting',
'settings' => 'favicon',
'width' => 32,
'height' => 32,
)
) );
这里我们直接使用了wordpress的内置控件WP_Customize_Site_Icon_Control,这个控件可以直接对图片进行上传和裁剪。
然后我们在header.php公共头里使用使用这个favicon:
<?php
if ($icon = wp_get_attachment_url(get_theme_mod('favicon'))) {
echo '<link rel="shortcut icon" href="'.$icon.'">';
}
?>
这里需要注意的是我们直接get_theme_mod取到的内容是一个数字id,我们需要使用wp_get_attachment_url获取图片id对应的url路径。
这样我们刷新页面 ,就能在标签页上看到我们设置好的的favicon了。


总结和预告
今天我们定义了一套主题的设置选项,之后我们会把所有跟主题相关的设置统统放到里面,wordpress的主题自定义设置设计得非常优雅,相对于以往的建立专门的主题设置页面而言,在自定义设置里添加相应的控制选项非常简单和直接,让我们可以对主题设定进行统一管理。
明天(第3天)我们将真正将这一套公共顶部搭建起来,并且实现页面在PC、平板、手机上的响应式布局。
如果你喜欢这个系列的文章,赶快关注我们吧,不要错过后续的更多干货噢。